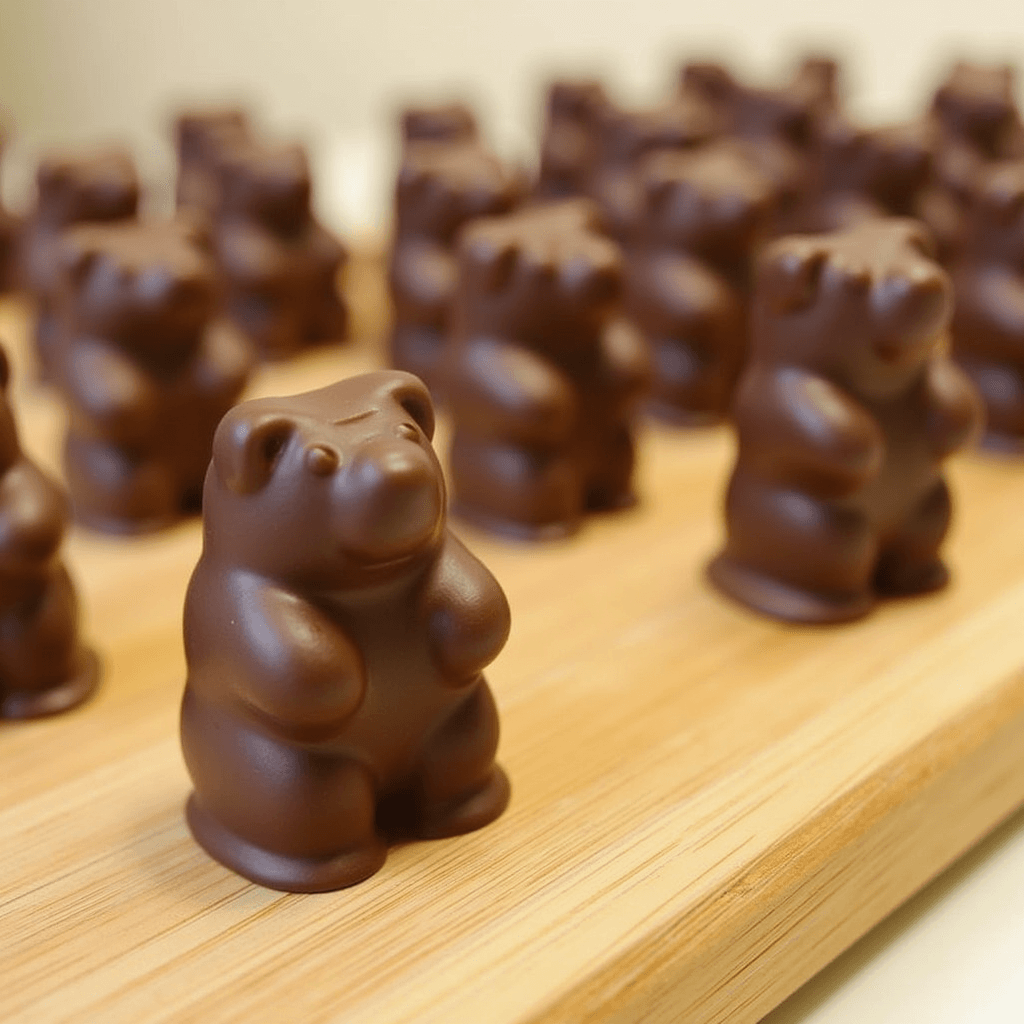
Who doesn’t love a sweet treat that combines the best of both worlds? Chocolate-covered gummy bears are a delightful fusion of rich, creamy chocolate and chewy, fruity gummies—a snack that’s as fun to make as it is to eat! Whether you’re planning a cozy movie night, a kids’ party, or simply looking for a creative snack idea, chocolate-covered gummy bears are a versatile and crowd-pleasing treat.
Making these at home is not only easy but also allows you to customize them with your favorite flavors, chocolates, and toppings. This blog post will guide you through everything you need to know to create perfect chocolate-covered gummy bears, from choosing the best ingredients to mastering the dipping process. Get ready to bring a touch of whimsy to your kitchen and create a snack everyone will adore!
Why Chocolate Covered Gummy Bears Are a Must-Try Treat
Chocolate-covered gummy bears offer an irresistible blend of textures and flavors that make them a standout snack for all ages. Here’s why these delightful treats deserve a spot on your must-try list:
1. The Perfect Balance of Sweetness and Texture
The combination of fruity, chewy gummy bears and smooth, rich chocolate creates a delightful contrast that’s hard to resist. The chocolate melts in your mouth while the gummy bear offers a satisfying chew, delivering a multi-sensory snacking experience. This unique pairing caters to both chocolate lovers and candy enthusiasts, making it a versatile treat.
2. A Customizable Snack for Everyone
One of the best things about chocolate-covered gummy bears is how easily they can be tailored to suit your preferences. You can experiment with different types of chocolate—dark, milk, white, or even flavored chocolate like mint or orange. Pair them with your favorite gummy bear flavors, from classic fruity options like cherry and orange to more adventurous varieties like pineapple or sour gummies.
3. Great for Any Occasion
Chocolate-covered gummy bears are a hit for any event or celebration. They’re perfect for kids’ birthday parties, holiday gatherings, movie nights, or as a fun gift idea. Pack them in decorative bags for party favors, add them to dessert platters, or simply enjoy them as a cozy snack. Their playful appeal and vibrant colors make them a conversation starter at any event.
4. A Creative Kitchen Adventure
Making chocolate-covered gummy bears at home is not just about the treat; it’s about the process. It’s a fun, hands-on activity that’s perfect for families or anyone looking to unleash their inner chef. Kids can help with dipping or decorating, turning it into a bonding experience. Plus, you get to control the quality of the ingredients and avoid artificial additives, making them a healthier alternative to store-bought versions.
5. They’re a Nostalgic Delight
For many, gummy bears are a nostalgic childhood favorite. Adding a chocolate coating elevates this classic candy to a gourmet level, creating a treat that appeals to both the young and the young-at-heart. The combination of nostalgia and indulgence makes chocolate-covered gummy bears an unforgettable snack.
Whether you’re trying them for the first time or revisiting a beloved favorite, chocolate-covered gummy bears promise a unique and delightful treat that’s well worth the effort.
Ingredients and Tools You’ll Need To Make The Perfect Chocolate Covered Gummy Bears
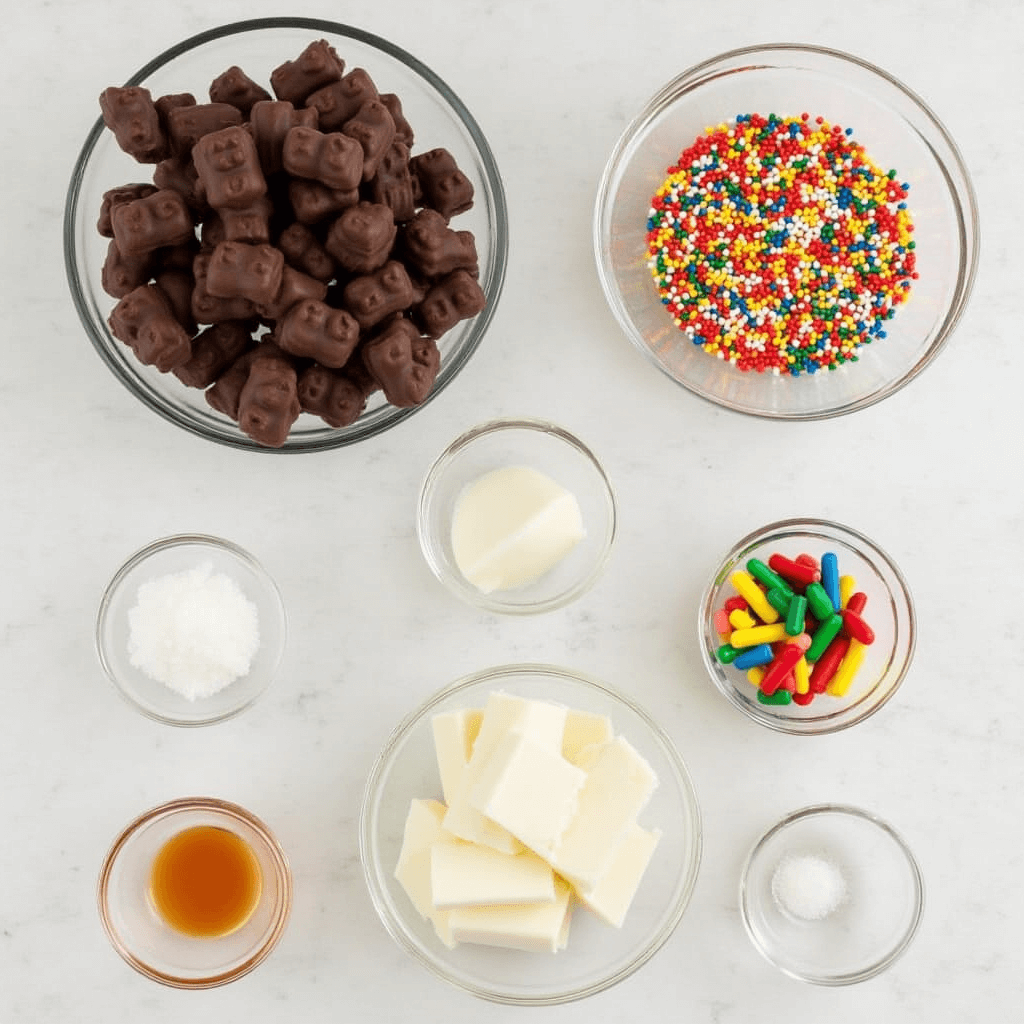
Before you dive into making your chocolate-covered gummy bears, it’s essential to gather all the necessary ingredients and tools. Having everything prepped and ready will make the process smooth and enjoyable. Here’s a detailed look at what you’ll need:
Chocolate Covered Gummy Bears Ingredients
- Gummy Bears
- Choose your favorite brand and flavors of gummy bears. Whether you prefer classic fruit flavors or sour gummy bears, the choice is entirely yours. Opt for high-quality gummy bears for the best taste and texture.
- Chocolate
- Type of Chocolate: Use your preferred type of chocolate—milk, dark, or white. Each type brings a unique flavor profile to the treat.
- Quality Matters: High-quality chocolate with a smooth texture and rich flavor will yield the best results. Look for chocolates with a cocoa content that suits your taste.
- Optional Additions
- Sprinkles: Add a playful touch to your treats with colorful sprinkles.
- Sea Salt: A pinch of sea salt can enhance the flavor, especially if you’re using dark chocolate.
- Drizzle Toppings: Melted white chocolate or colored candy melts can be drizzled over the finished product for decoration.
Tools You will need in Chocolate Covered Gummy Bears Recipe
- Double Boiler or Microwave-Safe Bowl
- A double boiler is the best way to melt chocolate evenly without scorching it. If you don’t have one, a microwave-safe bowl works just fine—just heat the chocolate in short intervals, stirring frequently.
- Parchment Paper or Silicone Baking Mat
- These are essential for laying out your chocolate-covered gummy bears as they cool. They prevent sticking and make cleanup easier.
- Dipping Tools
- Toothpicks or Forks: For dipping individual gummy bears into the melted chocolate with precision.
- Chocolate Dipping Fork: A specialized tool designed for dipping candies can make the process even smoother.
- Baking Tray
- A flat baking tray or cookie sheet is needed to hold the parchment paper and your dipped gummy bears while they set.
- Cooling Rack
- While optional, a cooling rack can help air circulate around your treats, ensuring even setting.
- Microwave or Stovetop
- You’ll need one of these to melt the chocolate. Ensure you have a heat source that allows you to maintain low, even temperatures.
- Spoons and Bowls
- For transferring melted chocolate and organizing toppings if you’re adding decorative elements like sprinkles or sea salt.
Preparation Tips
- Workstation Setup: Arrange your tools and ingredients on a clean, flat surface to ensure an efficient workflow.
- Chill Gummy Bears (Optional): If you prefer firmer gummy bears during the dipping process, you can chill them in the refrigerator for about 10–15 minutes before starting.
- Pre-Melt Chocolate: Melt your chocolate just before you begin to ensure it stays smooth and warm throughout the dipping process.
With these ingredients and tools at hand, you’re fully equipped to create a batch of delicious, perfectly coated chocolate-covered gummy bears. Let’s get dipping!
Step-by-Step Guide to Making Chocolate Covered Gummy Bears
Making chocolate-covered gummy bears is a fun and simple process that transforms ordinary gummy candies into an indulgent treat. Follow this step-by-step guide to create perfectly coated gummy bears at home.
Step 1: Gather Your Ingredients and Tools
Before starting, make sure you have all the ingredients and tools prepared and within reach. This includes your gummy bears, chocolate of choice, dipping tools, and parchment paper. Preparing everything in advance ensures a seamless process.
- Pro Tip: Chill your gummy bears in the fridge for 10–15 minutes before dipping. This helps the chocolate set faster and creates a firmer outer shell.
Step 2: Melt the Chocolate
The key to perfect chocolate-covered gummy bears lies in properly melted chocolate. You can do this using a double boiler or a microwave:
- Double Boiler Method:
- Fill the bottom pot of the double boiler with a few inches of water and bring it to a simmer.
- Place the chocolate in the top pot and stir continuously until melted and smooth.
- Microwave Method:
- Place chopped chocolate or chocolate chips in a microwave-safe bowl.
- Heat in 15-20 second intervals, stirring between each interval to prevent overheating.
- Important Tip: Avoid overheating the chocolate. If it gets too hot, it may seize or develop a grainy texture. Aim for smooth, glossy melted chocolate.
Step 3: Prepare the Dipping Station
Set up a dipping station to make the process efficient and mess-free.
- Lay a sheet of parchment paper or a silicone baking mat on a baking tray.
- Arrange your gummy bears in small batches to make them easy to handle.
- Keep dipping tools like forks, toothpicks, or a chocolate dipping fork nearby.
Step 4: Dip the Gummy Bears
Now it’s time to coat the gummy bears with chocolate.
- Dip Individually:
- Using a fork or toothpick, skewer one gummy bear at a time.
- Dip it into the melted chocolate, ensuring it’s fully coated.
- Gently tap the tool on the edge of the bowl to remove excess chocolate.
- Place on Parchment Paper:
- Transfer the coated gummy bear onto the parchment paper. Leave enough space between each candy to prevent sticking.
- Repeat:
- Continue the process until all gummy bears are dipped.
Step 5: Add Toppings (Optional) For Better Chocolate Covered Gummy Bears
While the chocolate is still wet, sprinkle your toppings for added flavor and decoration. Some great options include:
- Colored sprinkles for a festive touch.
- A pinch of sea salt for a sweet-and-savory flavor.
- Drizzles of contrasting chocolate for an artistic look.
- Tip: Work quickly before the chocolate hardens to ensure the toppings stick.
Step 6: Let the Chocolate Set
Allow the chocolate to cool and harden completely.
- Refrigerator Method: Place the tray of gummy bears in the fridge for 15–20 minutes to speed up the process.
- Room Temperature Method: Let the chocolate set naturally for about 30 minutes, depending on your environment.
Step 7: Store and Enjoy Your Chocolate Covered Gummy Bears
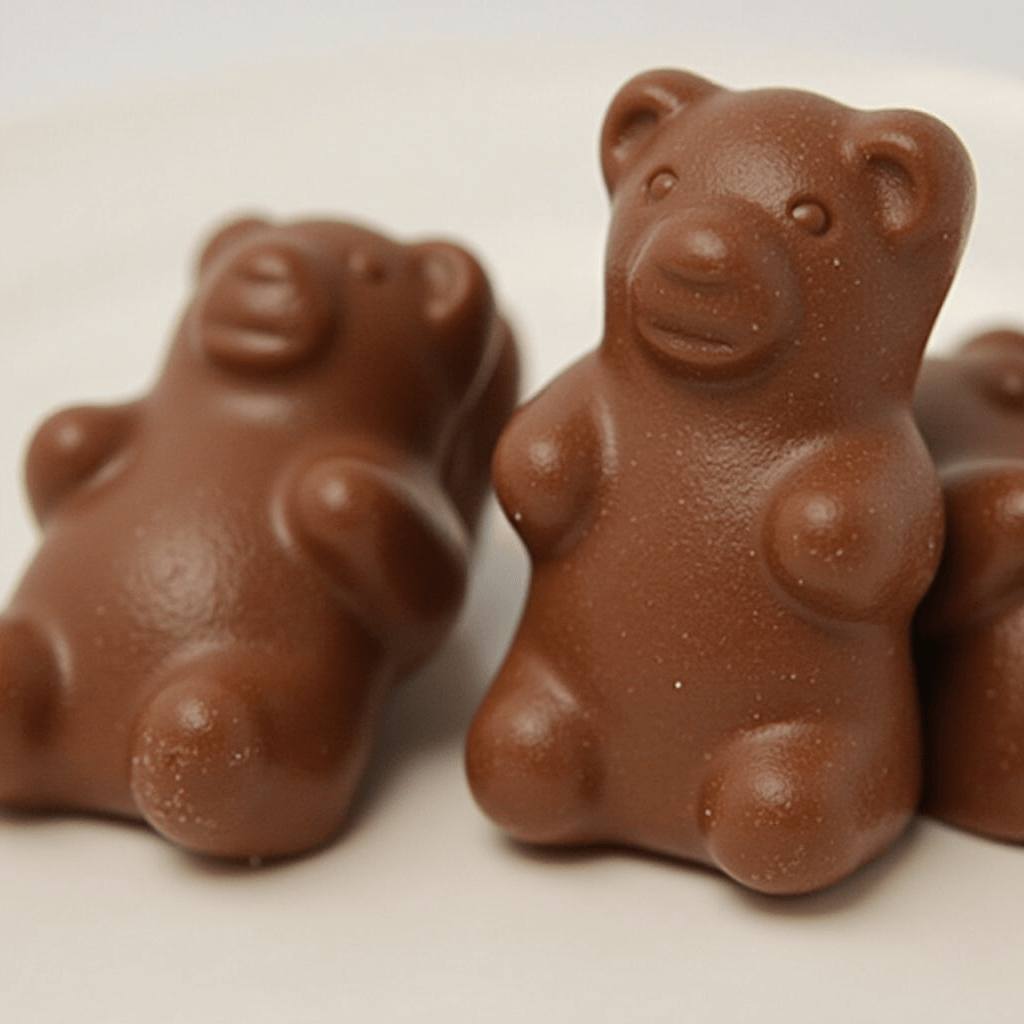
Once the chocolate is firm, your chocolate-covered gummy bears are ready to enjoy!
- Storage Tips:
- Store them in an airtight container at room temperature for up to a week.
- If your environment is warm, store them in the refrigerator to prevent the chocolate from melting.
- Serving Ideas:
- Enjoy them as a snack, pack them in lunchboxes, or share them as a homemade gift in decorative packaging.
Bonus Step – Bless the Recipe with Love and Peace and Goodness
Before serving, take a moment to sprinkle a little love and gratitude into your dish. Remember, the best recipes are made with care and joy!
Creating chocolate-covered gummy bears at home is a delightful and rewarding process. With these steps, you can make a batch of perfectly coated treats that are as fun to create as they are to eat!
Tips and Tricks for Perfect Chocolate Covered Gummy Bears
Creating chocolate-covered gummy bears at home can be an enjoyable and rewarding experience, especially when you follow a few simple tips and tricks. These handy suggestions will help you avoid common pitfalls and elevate your homemade treats to perfection. Whether you’re new to candy-making or a seasoned pro, these insights will ensure your gummy bears turn out beautifully coated and deliciously irresistible.
Choose the Right Chocolate
The type and quality of chocolate you use make a big difference in the final result.
- High-Quality Chocolate: Opt for high-quality chocolate bars or couverture chocolate instead of lower-grade chocolate chips. This ensures a smooth, glossy finish and a rich flavor.
- Type of Chocolate: Depending on your preference, you can use milk, dark, or white chocolate. Each type pairs uniquely with the fruity flavors of gummy bears.
- Tip: If you’re using chocolate chips, add a small amount of coconut oil or vegetable shortening to improve the consistency and make dipping easier.
Temper the Chocolate for a Professional Chocolate Covered Gummy Bears Finish
Tempering chocolate ensures it sets with a glossy shine and a satisfying snap, especially important if you’re gifting or storing your treats.
- Use a thermometer to monitor the chocolate’s temperature:
- Dark chocolate: Melt to 120°F, then cool to 88–90°F.
- Milk/white chocolate: Melt to 105°F, then cool to 86–88°F.
- Stir continuously while tempering to ensure even cooling and avoid clumps.
If tempering feels intimidating, you can skip it, but the chocolate may have a slightly matte finish or develop a white “bloom” over time.
Prepare Your Workspace
Setting up a well-organized dipping station makes the process efficient and mess-free.
- Lay out parchment paper or silicone mats on your tray for easy cleanup and to prevent sticking.
- Use toothpicks, forks, or dedicated chocolate-dipping tools to coat the gummy bears without creating a mess.
- Work in small batches to ensure the chocolate doesn’t harden before you finish dipping.
Chill Gummy Bears Before Dipping
Chilling the gummy bears before dipping is a game-changer.
- Place the gummy bears in the refrigerator for 10–15 minutes before coating.
- Chilled gummy bears make the chocolate set faster, reducing the chance of dripping or uneven coatings.
Work Quickly to Prevent Chocolate from Hardening
Chocolate hardens quickly once it’s melted, so work efficiently.
- Dip one gummy bear at a time and immediately transfer it to the parchment-lined tray.
- If the chocolate starts to harden in the bowl, gently reheat it using the microwave or double boiler method, stirring frequently.
Customize Your Chocolate Covered Gummy Bears with Creative Toppings
Adding toppings can elevate the look and taste of your chocolate-covered gummy bears.
- Use sprinkles, crushed nuts, shredded coconut, or edible glitter for decoration.
- Drizzle melted white chocolate over dark chocolate-coated gummy bears for a striking contrast.
- Tip: Always apply toppings while the chocolate is still wet to ensure they stick.
Cool in the Refrigerator for Best Results
Once coated, place the tray in the refrigerator to cool and set the chocolate.
- Refrigerate for about 15–20 minutes. This helps the chocolate harden evenly and gives the gummy bears a glossy finish.
- Avoid leaving the gummy bears at room temperature for too long before chilling, as this can cause the chocolate to melt unevenly.
Store Properly to Maintain Freshness
Proper storage ensures your chocolate-covered gummy bears stay fresh and delicious.
- Use an airtight container to keep them from absorbing moisture or odors from the fridge.
- If storing for an extended period, separate layers with parchment paper to prevent sticking.
- Pro Tip: Chocolate-covered gummy bears taste best within a week but can be refrigerated for up to two weeks.
Experiment with Chocolate Covered Gummy Bears Variations
Once you’ve mastered the basics, have fun experimenting with different combinations and flavors!
- Try using sour gummy bears for a sweet-and-tangy twist.
- Coat half of the gummy bear in chocolate and leave the other half exposed for a playful look.
- Use colored candy melts to match festive or seasonal themes.
By incorporating these tips and tricks, you’ll not only create delicious chocolate-covered gummy bears but also enjoy the process from start to finish. These simple yet effective techniques ensure that your homemade treats turn out as delightful and professional-looking as store-bought versions only better because they’re made with love!
Fun Chocolate Covered Gummy Bears Variations to Try
Chocolate covered gummy bears are already a delightful treat, but why stop at the basics? Adding creative twists to this classic recipe can take your confectionery skills to the next level. Whether you want to enhance the flavor, experiment with textures, or make your treats more visually appealing, these fun variations are sure to inspire you.
1. Different Types of Chocolate
Experimenting with various types of chocolate can completely change the flavor profile of your gummy bears.
- Milk Chocolate: A classic choice with a sweet and creamy flavor that complements fruity gummies beautifully.
- Dark Chocolate: For a more sophisticated and less sweet treat, use dark chocolate with a high cocoa content. Its slight bitterness pairs exceptionally well with tangy gummy bears.
- White Chocolate: If you’re a fan of sweetness, white chocolate adds a rich, vanilla-forward taste that’s perfect for colorful gummy bears.
- Tip: You can even mix chocolates for a marbled effect or dip in one chocolate type and drizzle with another for visual appeal.
2. Flavor-Infused Chocolate
Add extra flavor to your chocolate coating by infusing it with spices or extracts.
- Peppermint Extract: Add a few drops for a cool, refreshing taste—great for holiday treats.
- Orange Zest: A dash of citrus zest in the chocolate adds a tangy brightness.
- Spices: Try cinnamon, nutmeg, or cardamom for a warm, spiced twist that’s perfect for fall or winter.
3. Add Crunchy or Decorative Toppings
Take the texture and appearance of your chocolate-covered gummy bears to the next level with creative toppings.
- Sprinkles: Use rainbow sprinkles, metallic sugar, or themed designs to match a party or holiday.
- Crushed Nuts: Almonds, pistachios, or hazelnuts add crunch and a nutty flavor.
- Shredded Coconut: For a tropical vibe, coat your gummy bears with sweetened or unsweetened coconut flakes.
- Edible Glitter or Gold Dust: Perfect for making your treats look extra fancy and eye-catching.
4. Seasonal or Themed Variations of Chocolate Covered Gummy Bears
Customize your gummy bears to suit holidays, seasons, or events.
- Holiday Colors: Use red and green gummy bears with white chocolate for Christmas or orange and black sprinkles for Halloween.
- Valentine’s Day: Heart-shaped gummy bears dipped in pink or red candy melts are adorable for romantic occasions.
- Patriotic Themes: Red, white, and blue sprinkles make your treats perfect for the 4th of July.
5. Double-Dipping for a Decadent Treat
Double-dipping your gummy bears can create a layered effect and amplify the flavor.
- Start by coating the gummy bears in dark chocolate. Let it set, then dip them into white chocolate for a stunning two-tone look.
- You can also dip the bears in chocolate and roll them in finely chopped nuts or crushed cookies before the chocolate hardens for added texture.
6. Sour Gummy Bears for a Chocolate Covered Gummy Bears Tangy Twist
Using sour gummy bears instead of regular ones creates a fun contrast between the tangy gummy and the sweet, creamy chocolate.
- Pro Tip: Coat the sour gummy bears lightly in cornstarch before dipping to prevent the sour sugar from clumping with the chocolate.
7. Colorful Candy Melts the KeyTo add a special touch To your Chocolate Covered Gummy Bears
For a more playful and vibrant look, use colored candy melts instead of traditional chocolate.
- Match the colors to a party theme, holiday, or even your favorite sports team.
- Drizzle contrasting colors over the dipped gummy bears for a striped or zigzag effect.
8. Frozen Chocolate Covered Gummy Bears
For a refreshing and chewy treat, freeze the chocolate-covered gummy bears after they’re made.
- Once dipped and hardened, store them in an airtight container in the freezer.
- The frozen gummies take on a unique texture and are especially enjoyable during hot weather.
9. Mix-and-Match Gummy Flavors
Combine different gummy bear flavors in one batch to create a variety pack of treats.
- Group complementary flavors together, such as cherry and chocolate, or contrast tart lemon gummies with sweet white chocolate.
- This mix-and-match approach makes your treats more exciting and perfect for sharing.
By trying out these variations, you’ll not only expand your chocolate-covered gummy bear repertoire but also discover endless ways to customize this simple snack for any occasion. Whether you prefer classic flavors, creative toppings, or playful twists, there’s a variation here to suit every taste!
If you loved making chocolate-covered peanuts, don’t miss our guide on How to Make Perfect Chocolate Covered Almonds at Home! to discover another delightful recipe that’s just as easy and delicious!
Conclusion
Chocolate-covered gummy bears are a delightful treat that combines the chewy, fruity goodness of gummy bears with the rich, creamy decadence of chocolate. They’re the perfect indulgence for any occasion—whether you’re whipping up a batch for a party, creating a gift for a loved one, or simply treating yourself to a fun snack. What makes this recipe so special is its versatility and simplicity. With just a few ingredients and some creativity, you can make a treat that looks and tastes like it came straight from a gourmet shop.
From selecting high-quality chocolate to experimenting with flavors and textures, making chocolate-covered gummy bears at home is an enjoyable and rewarding experience. You can customize them to suit your personal preferences, from using different types of chocolate to adding unique toppings or incorporating themes for holidays and celebrations. The possibilities are endless, allowing you to create treats that are as beautiful as they are delicious.
Not only are chocolate-covered gummy bears a hit with kids, but adults also love the nostalgic charm and the contrast of flavors and textures. They’re a snack that bridges generations, making them ideal for family gatherings, birthdays, or even office parties. Plus, when you make them yourself, you have full control over the quality of the ingredients and the level of sweetness, making them a healthier alternative to store-bought versions.
So, whether you’re a seasoned home cook or a beginner looking for a fun project, this recipe is a fantastic way to unleash your creativity in the kitchen. Gather your ingredients, follow the steps, and add your own twist to make these chocolate-covered gummy bears truly your own. Once you’ve tasted the results of your efforts, you’ll never look at store-bought candy the same way again.
Start your chocolate-covered gummy bear journey today, and let your imagination lead you to the perfect combination of flavors and textures. Enjoy every bite of your homemade creations, and don’t forget to share the joy with others—they’re too delicious to keep to yourself!
2 thoughts on “How to Make Perfect Chocolate Covered Gummy Bears at Home”